
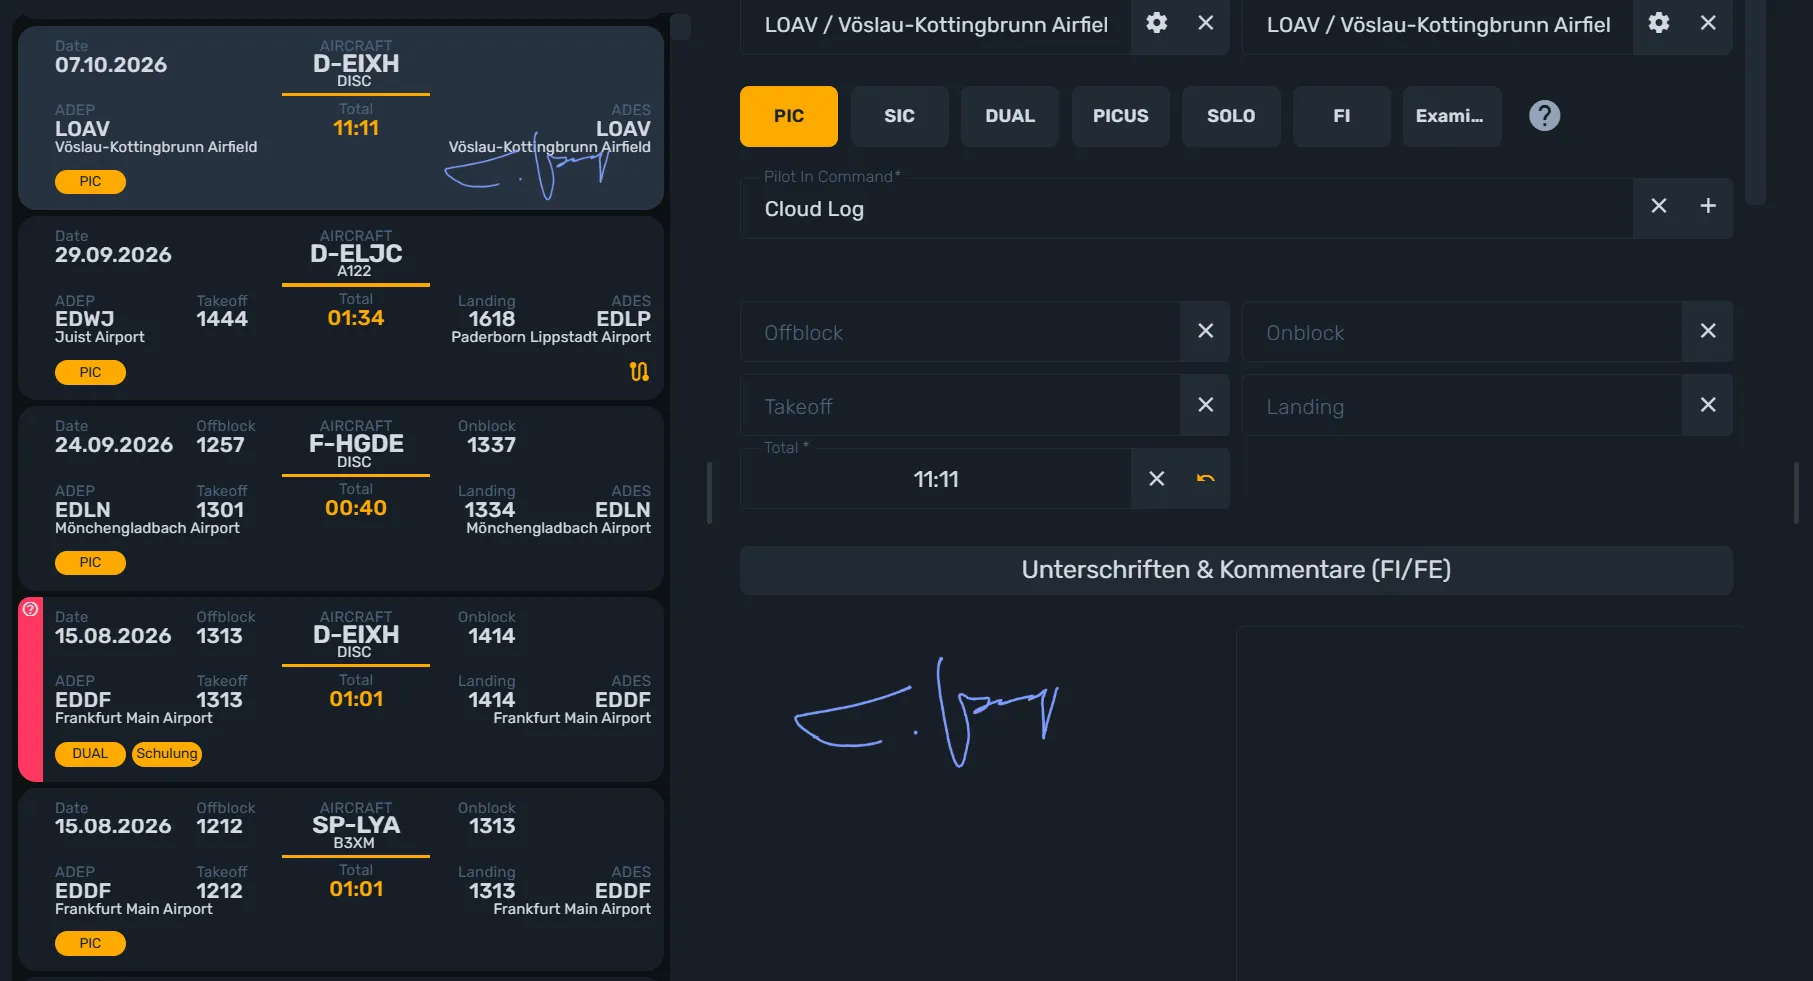
After a training or checkride flight, you often need confirmation from your instructor or examiner before the logbook entry is really complete. In cloudlog.aero this works digitally: you can have a flight signed on the spot, or send a signature request that the other person can confirm later from a different device. This guide walks you through both sides – requesting a signature and giving one.
What flight signatures do
Every saved flight can carry exactly one digital signature. You choose whether to collect it directly on your device (“Sign now”) or send it as a request to a contact (“Request signature”). If that contact is a cloudlog.aero user themselves, the request lands in their signature request inbox; if not, they instead get an emailed link that lets them sign without an account of their own. Every request has a status – Open, Signed, or Rejected – that you can track at any time.
What you need
- The flight must already be saved. The signature options only appear once the flight has an ID.
- To send a request you need a contact with an e-mail address under “Contacts”.
- Only one signature is allowed per flight – once one exists, the buttons disappear.
Step by step: requesting a signature
1. Open the flight and bring up the signature options
Open the already saved flight in the flight editor. For training flights that must be signed, two tiles automatically appear below the flight times: “Sign now” and “Request signature”, additionally highlighted by a red dashed border with the tooltip “Training flights must be signed by an instructor or examiner”.
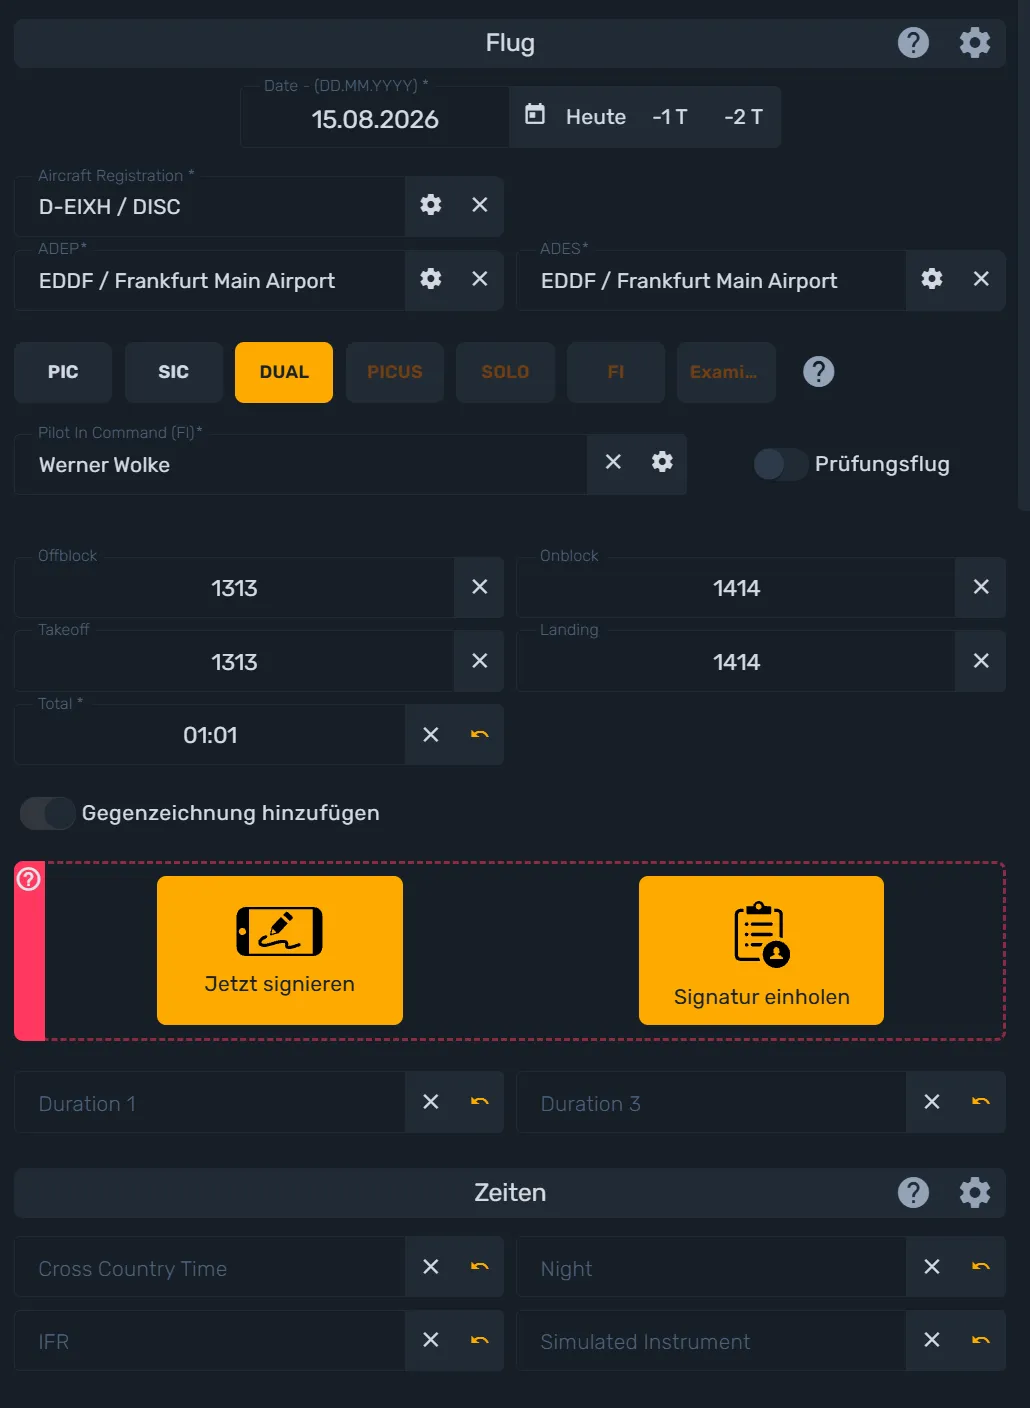
For every other flight a signature is voluntary: the two tiles only show up once you switch on the “Add countersignature” toggle, which is disabled for DUAL flights since a signature is mandatory there anyway.
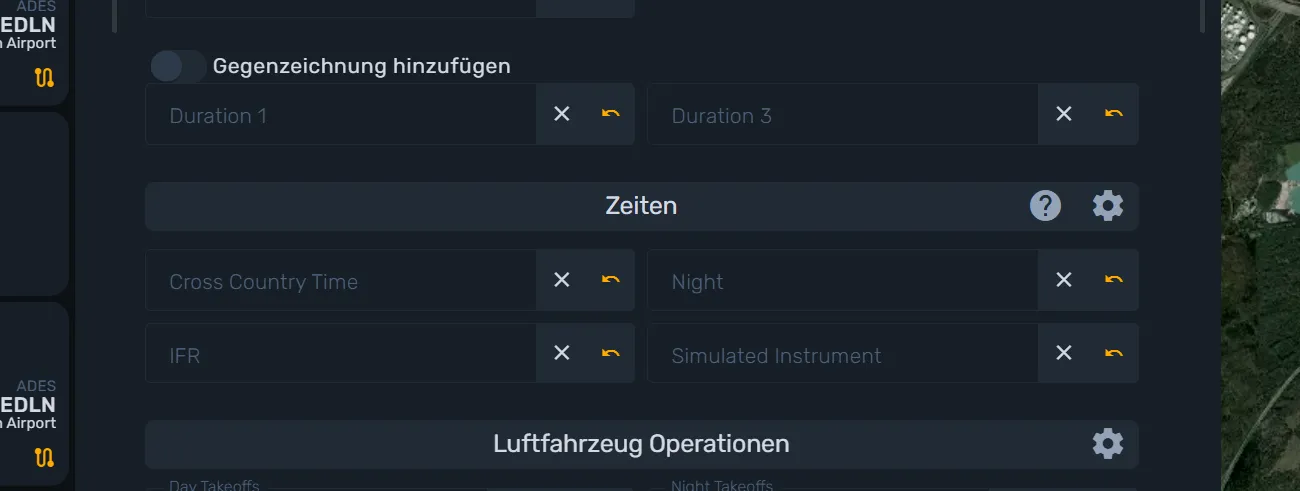
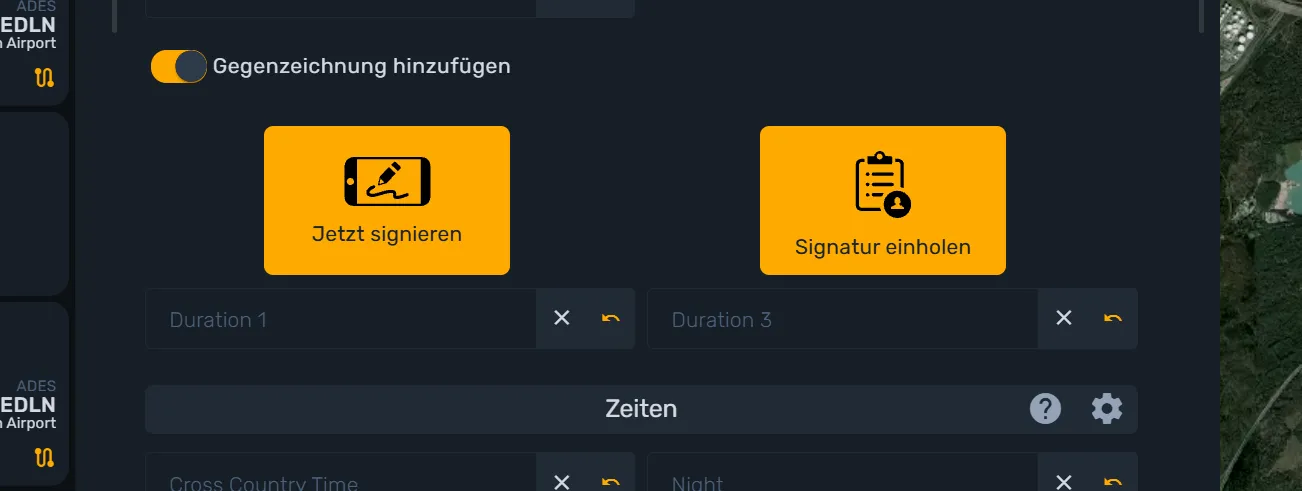
2. Have it signed on the spot
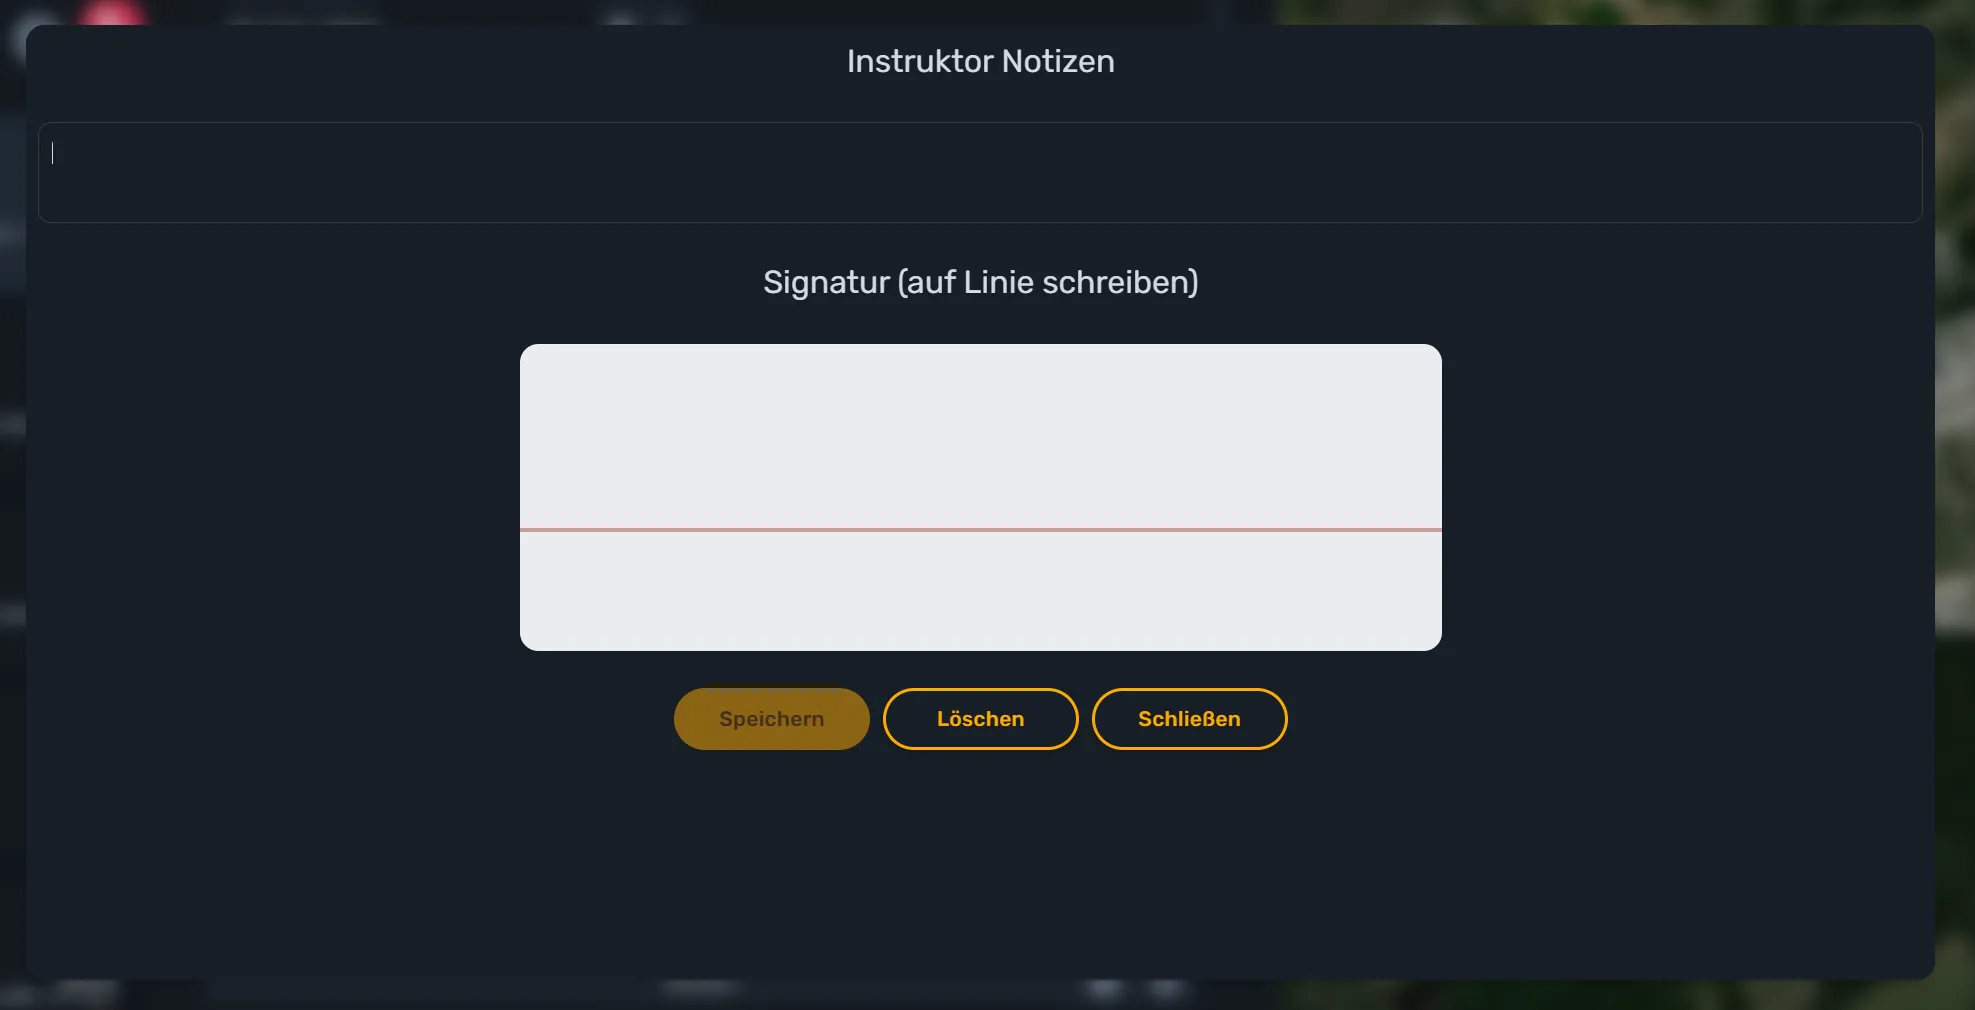
Click “Sign now” to have the flight signed together on your own device. In the window that opens, “Signature (write on the line)”, your instructor or examiner can optionally add a note in the “Instructor” field and then sign with a finger or the mouse on the marked line. “Delete” lets you restart the signature at any time, and “Save” applies it together with the flight.
3. Alternatively: request a signature – add a contact and send the request
For this path you first need a contact with a stored e-mail address: open the “Contacts” page in cloudlog.aero and click “Add Contact”. Enter first name, last name, and above all the e-mail address of your instructor or examiner; the “Instructor” and “Student” toggles additionally make them selectable in the corresponding fields of the flight editor. Without a stored e-mail address you won’t be able to send this contact a signature request later.
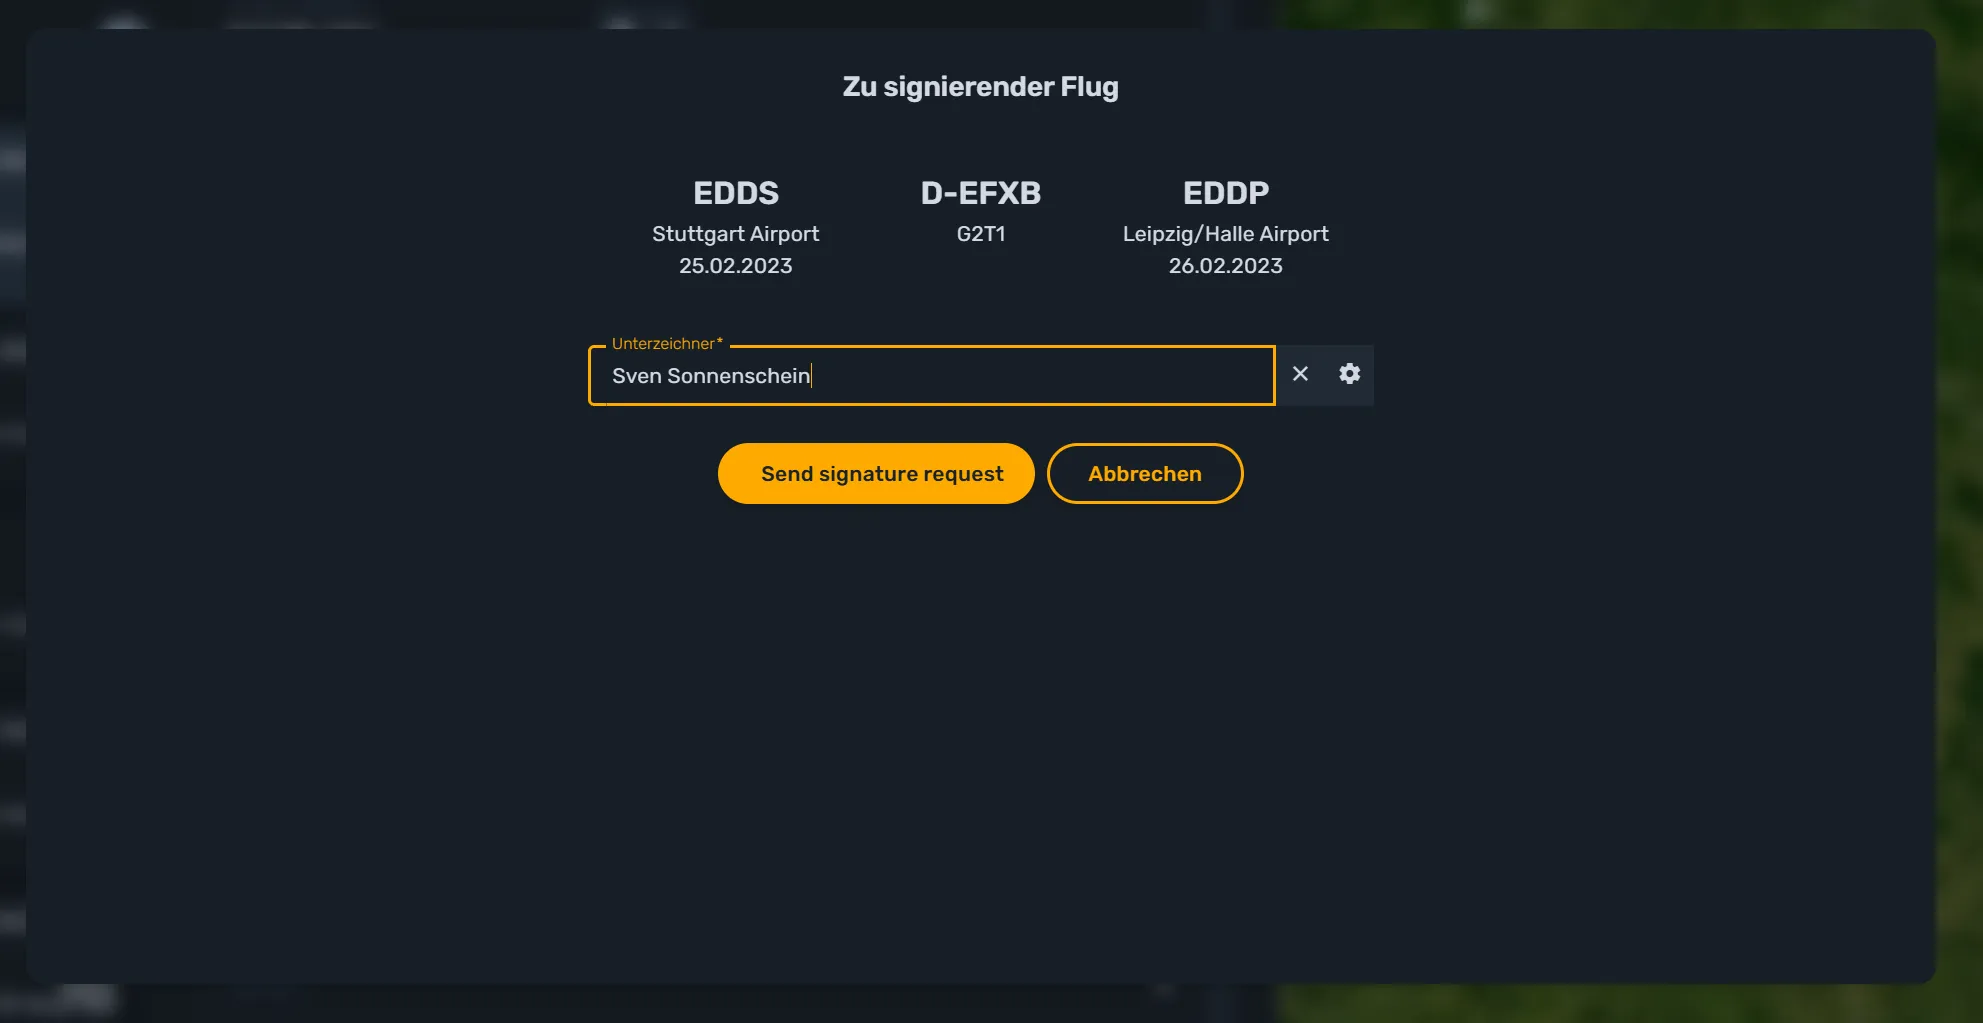
If you click “Request signature” in the flight editor, the “Flight to sign” dialog opens with a summary of the flight information. In the “Signer” field, pick the right contact from your contact list – only contacts with a stored e-mail address can be selected. Confirm with the “Send signature request” button; cloudlog.aero then notifies your contact automatically and gives them the chance to sign the flight digitally.
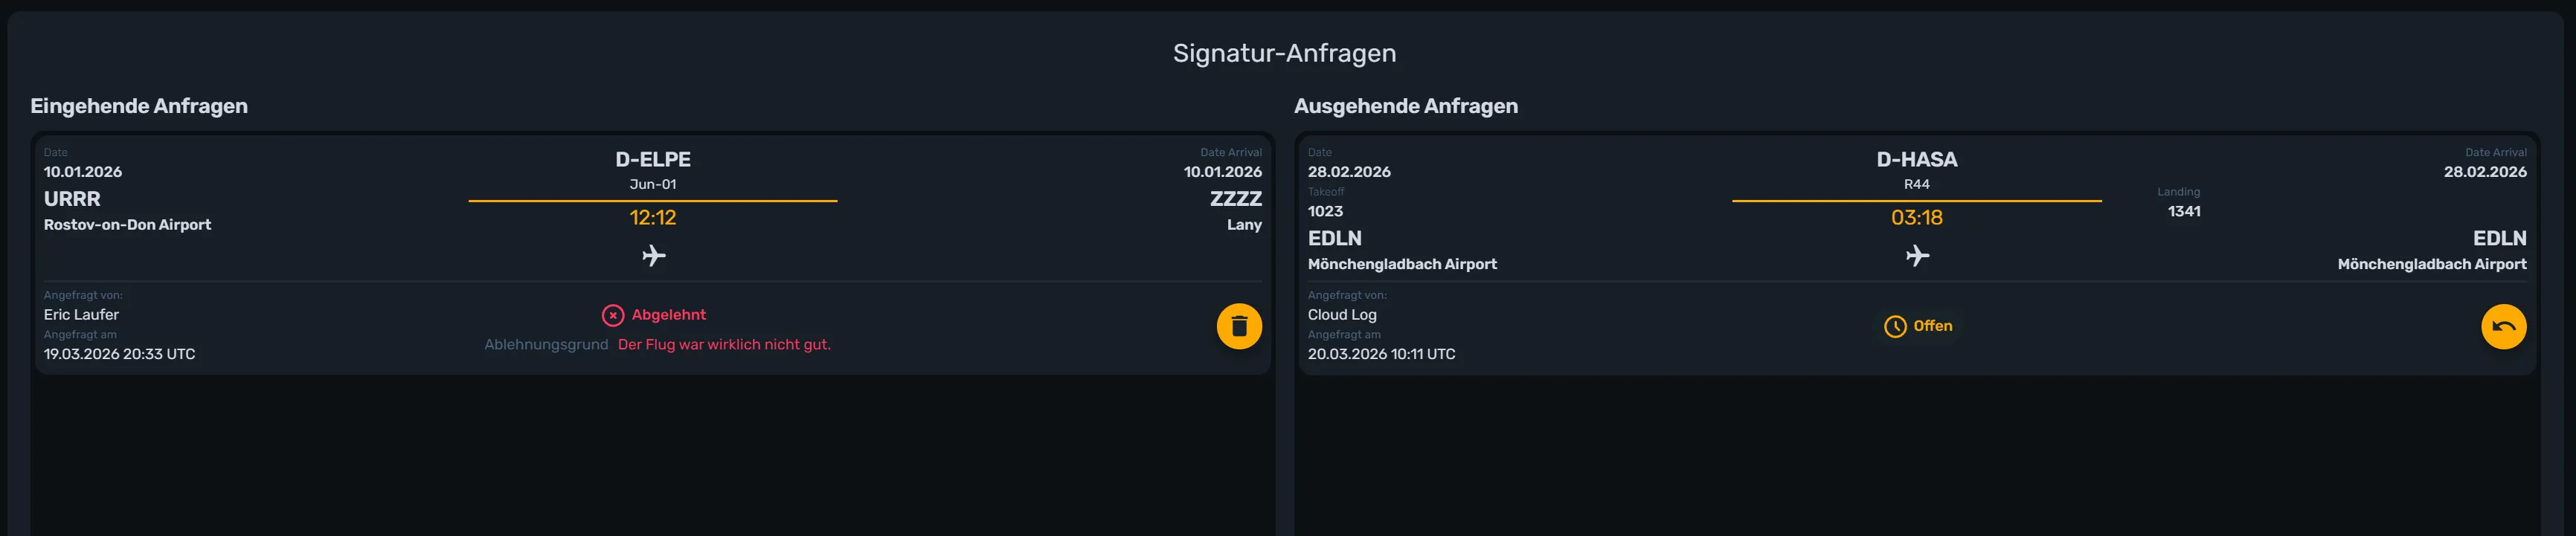
If your contact is a cloudlog.aero user themselves, you can also keep an eye on the request yourself afterwards: under “Signature Requests”, next to the incoming requests, you’ll find an “Outgoing Requests” section with the signer, request date, and current status (“Open”, “Signed”, or “Rejected” including the rejection reason). You can revoke a still-open request there via the “Revoke Request” icon, or delete an already completed one via the trash icon.
Step by step: giving a signature
4. Check an incoming request as a cloudlog.aero user
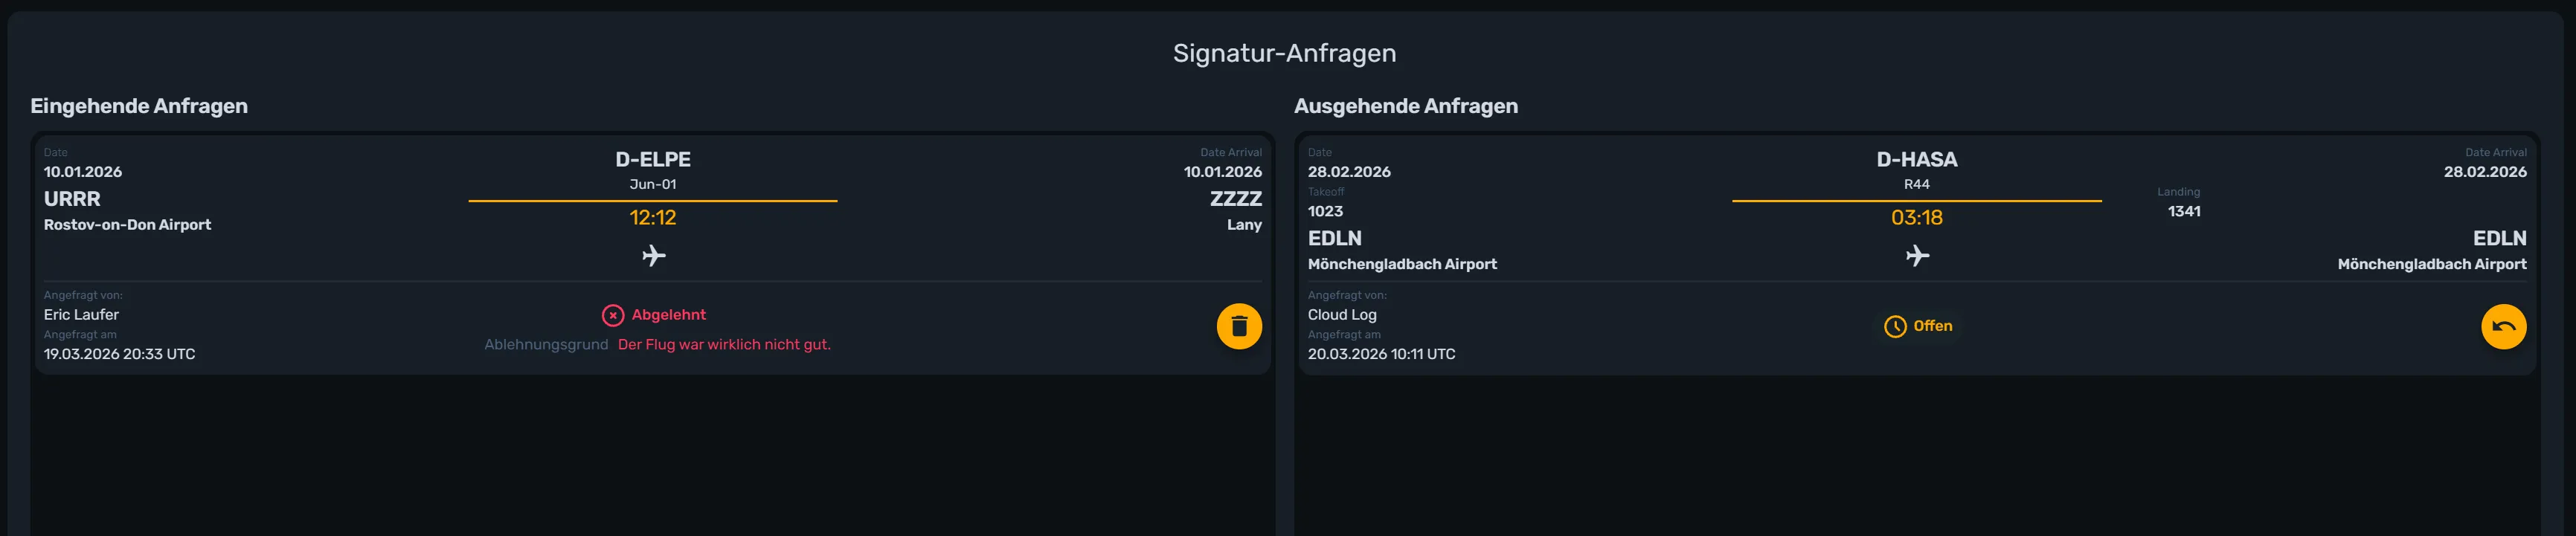
If you have a cloudlog.aero account yourself, a new “Signature Requests” item appears in the main menu, together with a number for open incoming requests, as soon as at least one request is addressed to you. On this page, under “Incoming Requests”, you see each flight’s date, flight times, aircraft, airports, as well as the requester’s name and when the request was made.
5. Sign or reject the request
Each open incoming request offers two icons: the pencil icon opens the same signature dialog used for direct signing, so you can enter a note and signature and confirm with “Save”. The X icon instead opens the “Reject request” dialog, where you enter a short reason in the “Rejection Reason” field and confirm with “Reject”. The status then changes to “Signed” or “Rejected”, including a visible rejection reason.
6. Sign as an external contact without your own account
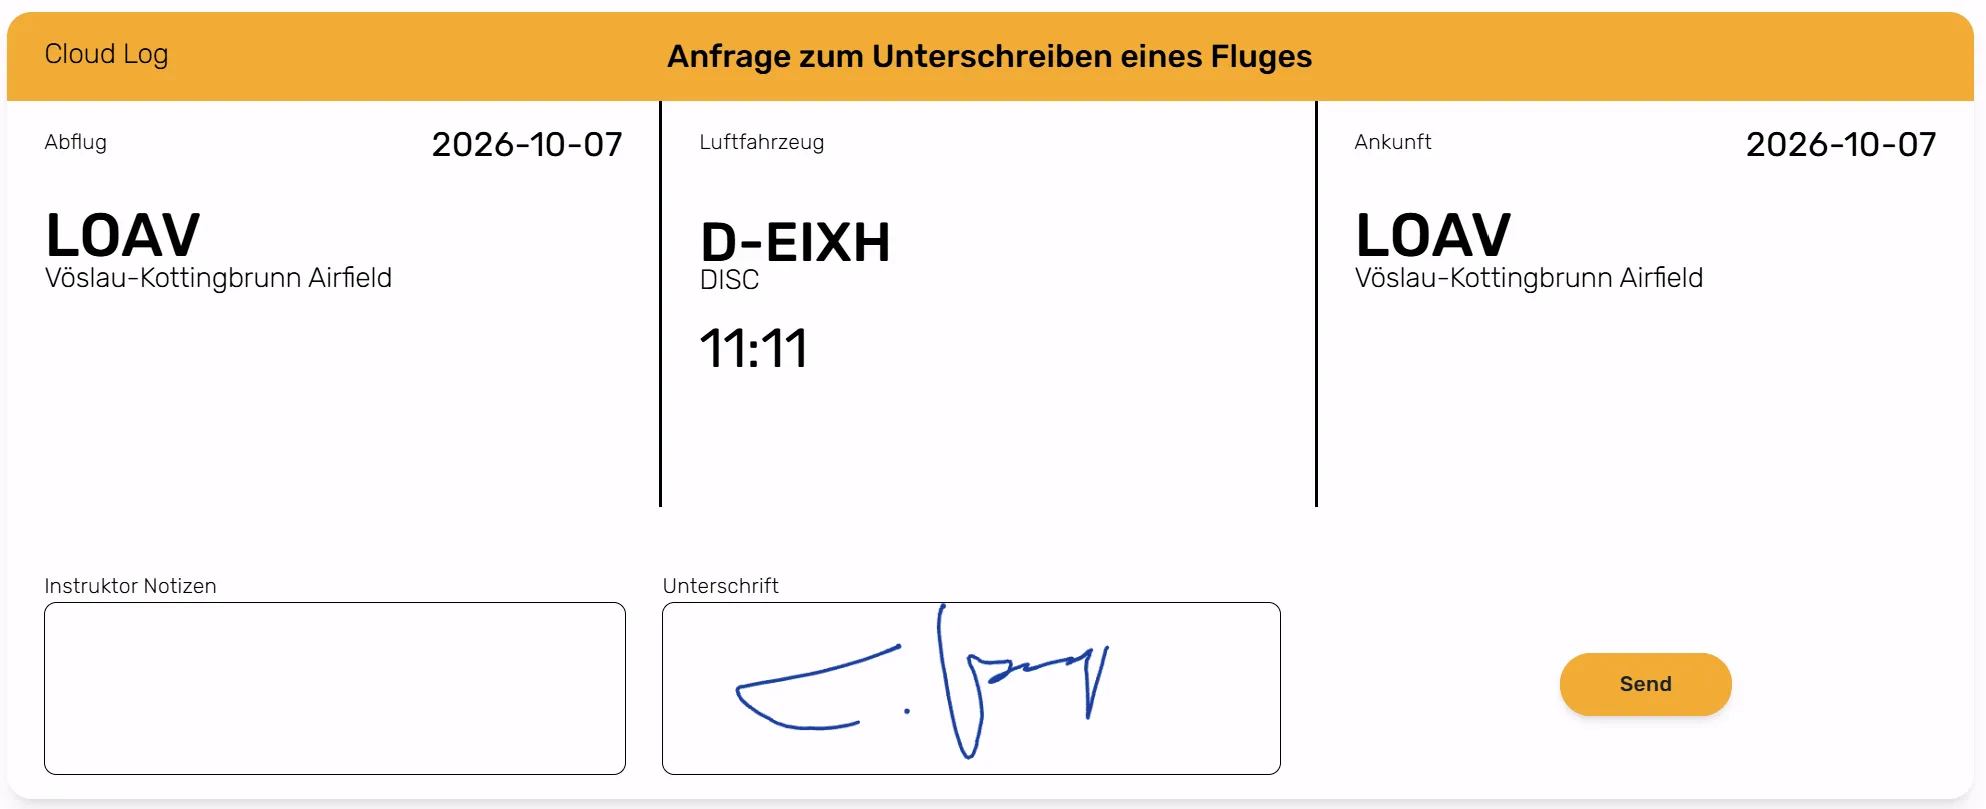
If you’re not a cloudlog.aero user yourself, you instead receive an e-mail with a personal link. It takes you to a standalone “Flight signing request” page with the same flight data, a notes field, and a clickable signature area – no login or account required.
7. View the signed flight in the logbook
Once a signature exists, the flight editor shows the “Signature & Notes (FI/FE)” section with the recorded signature and its accompanying note. The “Delete signature and remark (FI/FE)” button lets you remove both again if needed.
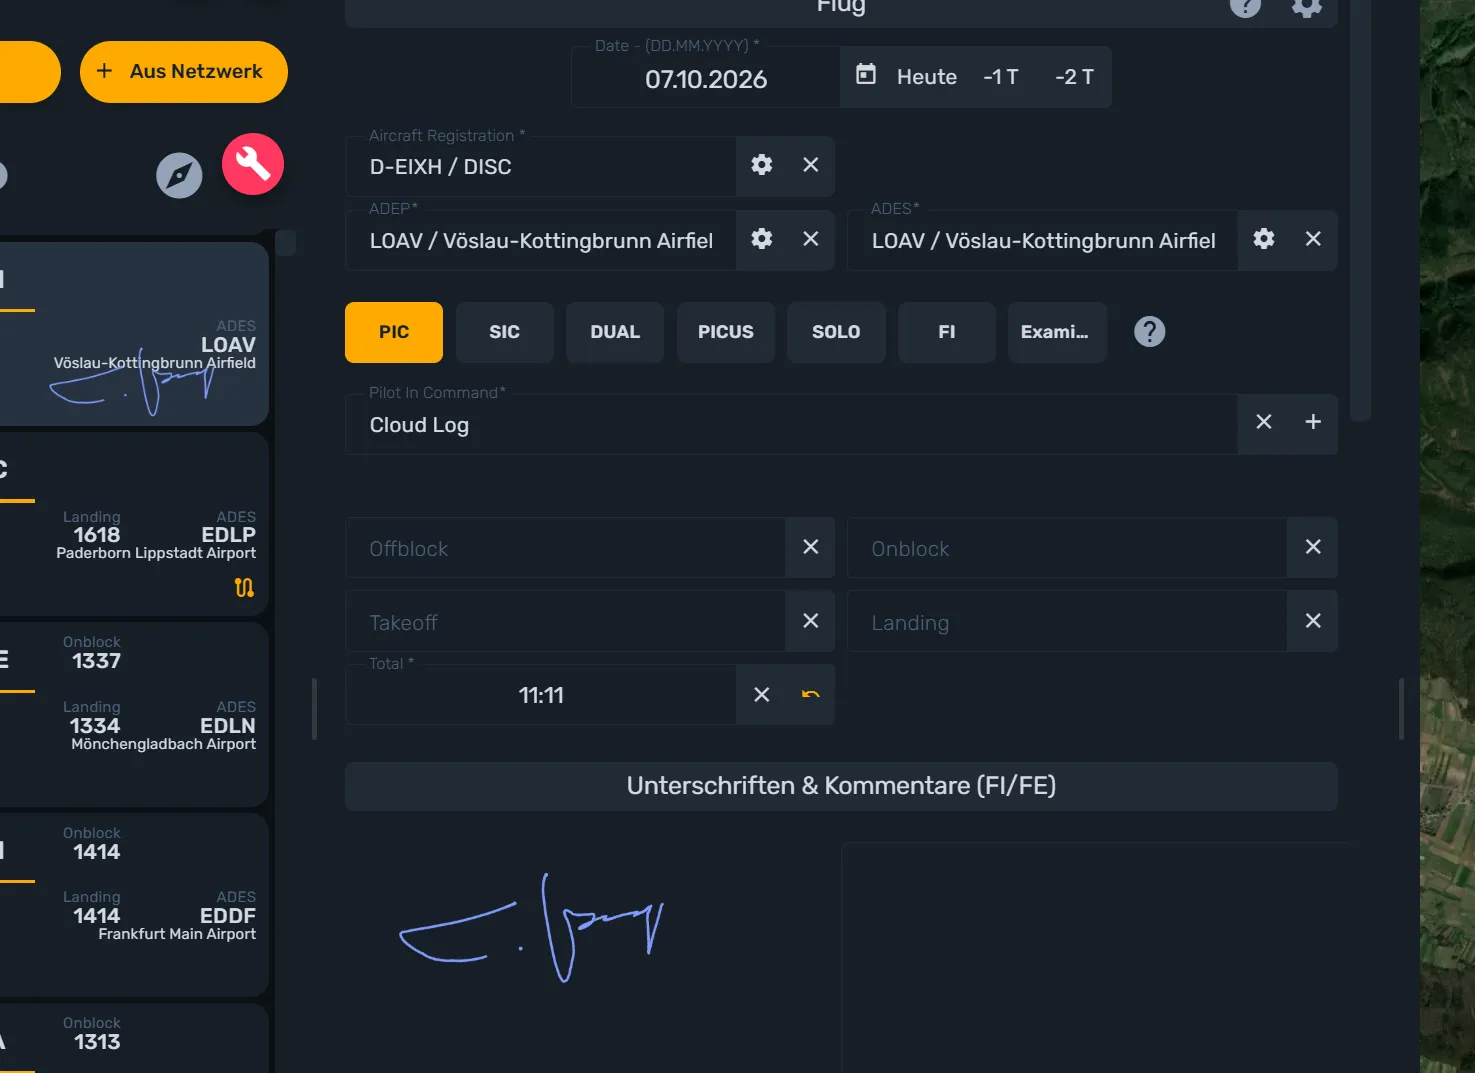
This is exactly what the digital signature is ultimately for: once you generate a PDF of your logbook under “Printouts” afterwards, the stored signature is automatically carried over onto the corresponding logbook page – just as if your instructor or examiner had signed directly on paper.
Common issues
- The “Sign now” and “Request signature” buttons are missing. The flight hasn’t been saved yet, already has a signature, or already has an open request.
- The contact you want isn’t selectable. No e-mail address is stored for that contact – add one first under “Contacts”.
- “A signature already exists for this flight.” Only one signature is allowed per flight; a second request is only possible after deleting the existing signature.
- Changes to an already signed flight won’t save. cloudlog.aero warns you that the signature will become invalid when you save and must be removed first.
Conclusion
Whether directly on the device or by request across a distance: digital signatures in cloudlog.aero bring your instructor’s or examiner’s confirmation into the logbook without any paperwork – and the other person doesn’t even need their own account. Add the right contact with an e-mail address, choose “Sign now” or “Request signature”, and keep an eye on the status at any time via the signature requests. When you later export a PDF under “Printouts”, the signature is automatically placed on the matching logbook page – which is the whole point of the exercise.
Don’t have an account yet? Try cloudlog.aero at app.cloudlog.aero.